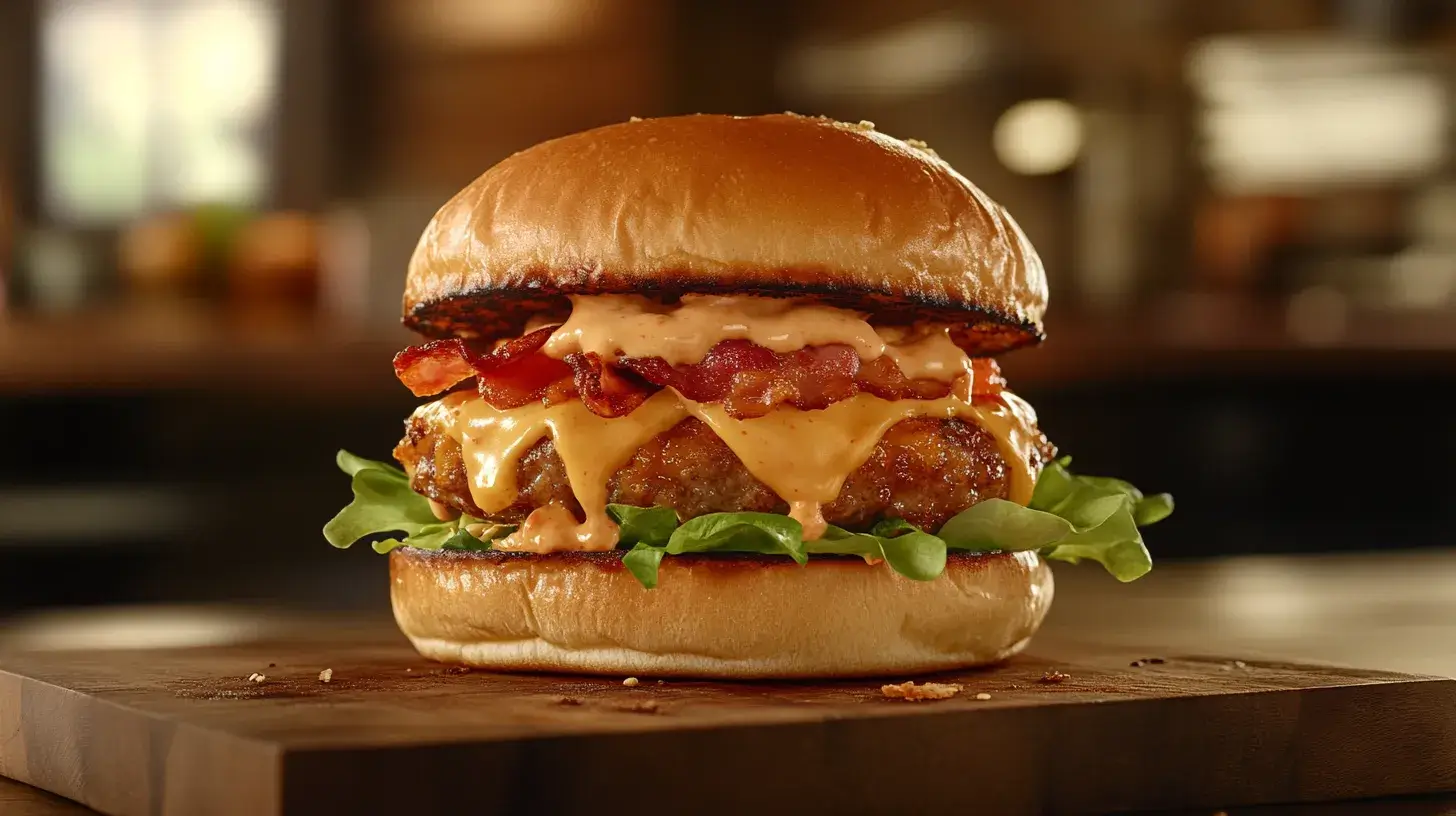
The first time I nailed a baconnaise smash burger in my kitchen, I knew I’d never look at burgers the same way again. That perfect sear on the beef, the rich bacon-infused mayo, and the way all the flavors came together – it was a game-changer.
Here’s what I’ve discovered after years of burger experimentation: those fancy $18 gastropub smash burgers can be made at home for a fraction of the cost, and they’ll taste even better. The magic lies in understanding a few simple techniques that transform ordinary ingredients into something extraordinary.
What makes the baconnaise smash burger special isn’t fancy ingredients – it’s the combination of intense heat creating a beautiful crust on the beef while trapping juices inside, and that incredible bacon-infused mayo that adds smoky depth to every bite. The best part? The entire process takes under 30 minutes from start to finish, making it perfect for a weeknight dinner that feels like a special occasion.
Ingredients
For the Homemade Baconnaise (makes about 1 cup)
- 6 slices thick-cut bacon (applewood smoked if you can find it)
- 3/4 cup high-quality mayonnaise
- 1 tablespoon Dijon mustard
- 1 teaspoon fresh lemon juice
- 1/2 teaspoon garlic powder
- 1/4 teaspoon smoked paprika
- 1/8 teaspoon cayenne pepper (optional)
- Freshly ground black pepper to taste
For the Burger Patties
- 1 pound (454g) ground beef (80/20 beef chuck)
- Kosher salt
- Freshly ground black pepper
For Assembly
- 4 brioche burger buns
- 4 slices American cheese
- 1 large tomato, sliced
- 1/2 red onion, thinly sliced
- Butter lettuce or green leaf lettuce
- Butter for toasting buns
- Pickle slices (optional)
When it comes to making exceptional burgers, the details matter. That 80/20 beef ratio isn’t just a suggestion – it provides the perfect amount of fat for flavor and juiciness while still holding together when smashed. For the bacon, go for thick-cut slices that will give you substantial pieces in the baconnaise.
And while I’m normally all about fancy cheeses, good old American cheese has unmatched meltability that’s perfect for this burger. Fresh, crisp vegetables provide the perfect contrast to the rich meat and sauce, making every bite balanced.
Substitutions and Variations
Over countless burger nights, I’ve adapted this recipe many ways to suit different preferences and dietary needs. Here are some of my favorite variations:
Protein Alternatives
- Ground turkey thigh (add a tablespoon of olive oil per pound for juiciness)
- Ground chicken (dark meat works best)
- Plant-based meat alternatives like Beyond or Impossible
- Salmon patties for a completely different but equally delicious twist
Dietary Modifications
Gluten-Free Version
Use gluten-free brioche or challah buns and verify your mayonnaise is gluten-free (most are).
Dairy-Free Adaptation
Skip the butter when toasting buns and use a dairy-free cheese alternative. The baconnaise itself contains no dairy.
Lower-Carb Option
Try a lettuce wrap instead of a bun, or create a “burger bowl” with all components served over fresh greens.
Flavor Variations
For a Southwestern twist, add chipotle in adobo to the baconnaise and top with pepper jack cheese and avocado.
The breakfast version is a weekend favorite – top with a fried egg and use maple-glazed bacon in your baconnaise. It’s incredible on an English muffin for brunch.
When I’m feeling fancy, a half-teaspoon of truffle oil in the baconnaise with caramelized onions and mushrooms turns this into a special occasion burger.
Step-by-Step Instructions
Preparing the Homemade Baconnaise
- Start with a cold skillet to help the bacon render evenly. Arrange bacon slices in a single layer and cook over medium heat until properly crispy, about 8-10 minutes, flipping occasionally.
- Transfer bacon to a paper towel-lined plate, saving 2 tablespoons of that rendered fat – it’s the secret to intense flavor.
- Once cool enough to handle, finely chop 4 slices and set aside the remaining 2 for topping the burgers.
- In a food processor, combine mayonnaise, chopped bacon, reserved bacon fat, Dijon, lemon juice, garlic powder, smoked paprika, and cayenne if using.
- Pulse rather than blend continuously – you want visible bacon bits throughout for texture and pops of flavor.
- Season with black pepper to taste, then refrigerate for at least 30 minutes to let the flavors meld.
Pro Tip: Let the bacon fat cool slightly before adding to the mayo to prevent breaking the emulsion. I learned this the hard way after a few separated, oily batches.
Cooking the Perfect Smash Burger Patties
- Divide your ground beef into 4 equal portions (about 4 ounces each) and gently form into loose balls without compacting the meat.
- Let the meat come to room temperature for about 15 minutes – cold meat hitting a hot pan contracts too quickly.
- Meanwhile, heat your cast-iron skillet over high heat until it’s smoking hot – at least 5 minutes of preheating. Don’t be timid with the heat here.
- When the pan is properly heated, add the beef balls one or two at a time, leaving space between them.
- Immediately place parchment paper over each ball, then press down firmly with your spatula, smashing to about 1/4-inch thickness. Apply significant pressure for about 10 seconds.
- Remove the parchment and season the exposed side with salt and pepper.
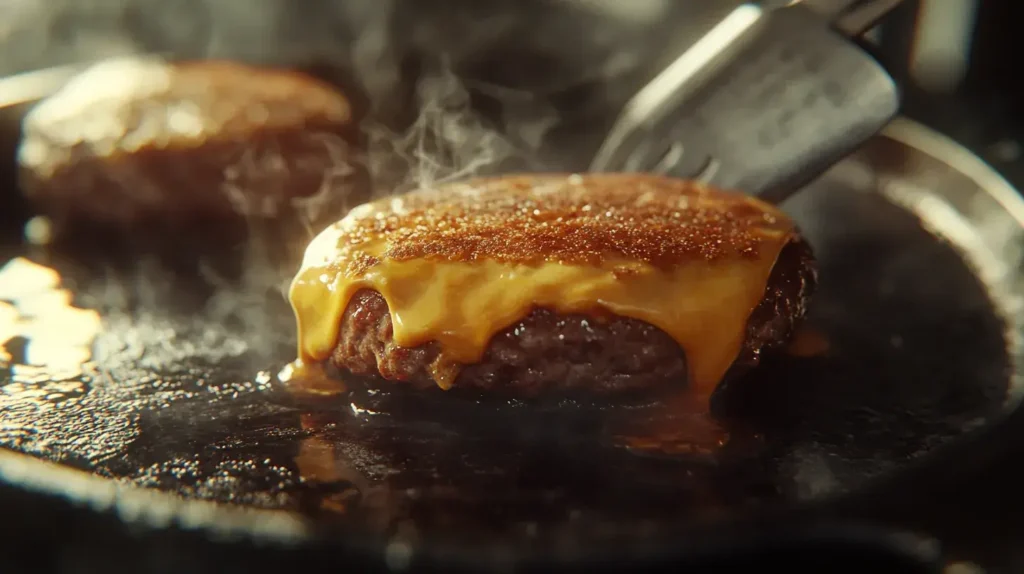
- Cook for about 1-2 minutes until the edges are deeply caramelized. Resist checking too early – that crust needs time to develop.
- Using a sharp metal spatula, scrape underneath the entire patty to release it, capturing all those flavorful bits, then flip in one swift motion.
- Immediately add cheese to each patty and cook just 30-45 seconds more.
- Transfer to a plate and repeat with remaining beef if needed.
The most common mistake I see is trying to smash the burger after it’s already started cooking. The magic window for smashing is in the first 10 seconds – after that, you’re just squeezing out juices.
Assembling Your Baconnaise Smash Burger
- Butter the cut sides of your buns and toast until golden in a clean pan.
- Spread a generous layer of baconnaise on both bun halves.
- Place lettuce on the bottom bun first – this creates a moisture barrier that prevents soggy buns.
- Add your cheese-topped patty while it’s still hot.
- Layer with tomato, red onion, and pickles if using.
- Crumble the reserved bacon over the top for extra texture and flavor.
- Crown with the top bun and press gently.
- My secret finish: wrap each burger in parchment for 1-2 minutes before serving. This traps steam, letting the flavors meld while slightly softening the bun.
Serving Suggestions
A burger this good deserves worthy companions. After much delicious “research,” these are my favorite pairings:
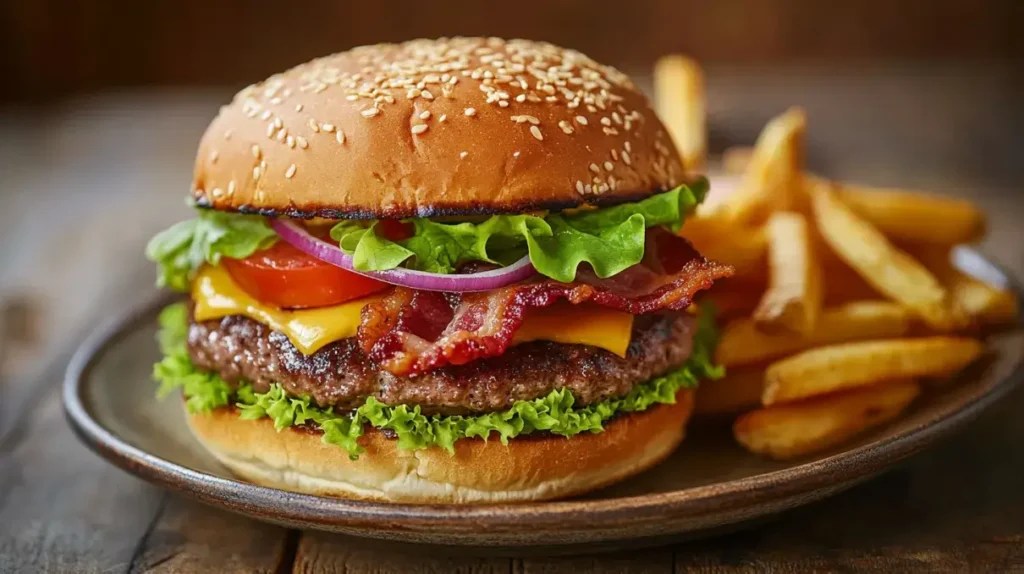
Hand-cut fries double-fried for extra crispiness are the classic choice, especially with extra baconnaise for dipping. Sweet potato fries with maple aioli offer a sweet contrast to the savory burger.
For something lighter, a simple arugula salad with lemon vinaigrette cuts through the richness perfectly.
Drink-wise, a cold IPA with citrus notes balances the richness, while an old fashioned works surprisingly well for cocktail lovers – the bourbon’s caramel notes complement the bacon. For non-alcoholic options, a tart lemonade refreshes the palate between bites.
When hosting, I love setting up a DIY burger bar with pre-smashed patties kept warm, toasted buns, and an array of toppings. It’s interactive and ensures everyone gets their perfect burger.
Why You’ll Love This Recipe
The homemade baconnaise alone is worth the effort. Unlike one-note condiments, it delivers complex flavors – smokiness from the bacon, richness from the fat, acidity from the mustard and lemon, and a hint of heat from the spices. I often make double batches because it disappears so quickly as a spread for other sandwiches too.
The smash technique creates a texture impossible to achieve any other way. That contrast between the intensely caramelized exterior and juicy interior is burger perfection – it’s the Maillard reaction at its finest, creating hundreds of flavor compounds as the proteins and sugars brown.
What I love most about this recipe is how it transforms simple ingredients into something extraordinary through technique rather than complexity. It’s the kind of cooking that makes you feel like you’ve discovered a chef’s secret.
Recipe FAQ & Troubleshooting
After sharing this recipe with countless friends, here are the common questions that come up:
“My burger isn’t getting that crispy crust. What’s wrong?” Your pan isn’t hot enough. Don’t be timid – a properly preheated cast iron should be almost smoking. Also, make sure you’re not overcrowding the pan, which drops the temperature dramatically.
“The patties fall apart when I flip them. Help!” You’re flipping too early. Wait until you see that deep browning around the edges, which signals that the crust has formed. Use a thin, sharp metal spatula and get completely underneath with a scraping motion.
“Can I make the baconnaise ahead of time?” Absolutely! It actually improves with time as the flavors meld. Store in an airtight container in the refrigerator for up to a week.
“My baconnaise looks separated. Can I fix it?” This happens when hot bacon fat hits cold mayo too quickly. Let it come to room temperature, then whisk vigorously until it comes back together. To prevent this, let your bacon fat cool slightly before adding it.
“How can I keep my buns from getting soggy?” Toast them well, place lettuce on the bottom bun as a moisture barrier, and if you’re not eating immediately, keep components separate until just before serving.
Storage & Reheating
While these burgers are best fresh off the griddle, sometimes you end up with leftovers:
The baconnaise keeps beautifully in an airtight container in the fridge for up to a week. The flavor actually deepens after 24 hours.
Cooked patties can be refrigerated for up to 2 days, though they’ll never be quite as good as freshly made. Store them separated by parchment in an airtight container.
For reheating, place refrigerated patties on a wire rack over a baking sheet in a 350°F oven for about 5 minutes. This gentle heating prevents them from drying out or overcooking.
Pro tip: Never store fully assembled burgers – they turn soggy. Keep components separate and reassemble when reheating.
Related Recipes
If you enjoyed this Baconnaise Smash Burger, try these related recipes:
Pulled Pork Sandwiches with White Barbecue Sauce – A Southern-inspired sandwich featuring juicy pulled pork and a tangy white BBQ sauce.
Juicy Burger Patty Secrets – Learn the best techniques to achieve the perfect juicy smash burger patty.
The Ultimate Guide to Grilled Cheese Burger – A cheesy twist on the classic burger with melty goodness in every bite.
Keto Cheeseburger Casserole – A low-carb take on the cheeseburger, baked into a comforting dish.
California Grilled Veggie Sandwich – A fresh and flavorful alternative with grilled veggies and tasty spreads.ny egg, crispy hash brown patty, and maple bacon on an English muffin.
Print
Baconnaise Crispy Chicken Tenders
- Total Time: 30 minutes
- Yield: 30 minutes 1x
Description
Crispy, golden buttermilk-marinated chicken tenders, coated in seasoned panko breadcrumbs and served with smoky homemade baconnaise. These juicy, crunchy tenders are perfect for dipping, snacking, or stuffing into a sandwich!
Ingredients
For the Baconnaise (Makes 1 Cup)
- 6 slices thick-cut bacon (applewood smoked preferred)
- ¾ cup high-quality mayonnaise
- 1 tablespoon Dijon mustard
- 1 teaspoon fresh lemon juice
- ½ teaspoon garlic powder
- ¼ teaspoon smoked paprika
- ⅛ teaspoon cayenne pepper (optional)
- Freshly ground black pepper
For the Chicken Tenders
- 1 pound chicken tenders
- 1 cup buttermilk
- 1 teaspoon hot sauce (optional)
- 1 teaspoon salt
- 1 teaspoon black pepper
- ½ teaspoon garlic powder
- ½ teaspoon onion powder
For the Crispy Coating
- 1 cup all-purpose flour
- ½ cup cornstarch
- 1 teaspoon smoked paprika
- ½ teaspoon cayenne pepper
- 1 teaspoon baking powder
- 1 egg
- 1 tablespoon water
- 1 ½ cups panko breadcrumbs
- Vegetable oil for frying
Instructions
1. Prepare the Baconnaise
- Cook bacon in a skillet over medium heat until crispy (8-10 minutes).
- Transfer to a paper towel-lined plate. Reserve 2 tablespoons of bacon fat.
- Finely chop 4 slices of bacon (reserve 2 slices for garnish).
- In a food processor, blend mayonnaise, chopped bacon, bacon fat, Dijon mustard, lemon juice, garlic powder, smoked paprika, and cayenne.
- Pulse until well combined but still slightly textured.
- Refrigerate for at least 30 minutes to meld flavors.
2. Marinate the Chicken
- In a bowl, combine buttermilk, hot sauce, salt, pepper, garlic powder, and onion powder.
- Add chicken tenders, ensuring they’re fully submerged.
- Cover and refrigerate for at least 1 hour (overnight for best results).
3. Prepare the Coating
- In one bowl, whisk flour, cornstarch, smoked paprika, cayenne, salt, and baking powder.
- In a second bowl, whisk egg and water.
- In a third bowl, place panko breadcrumbs.
4. Coat the Chicken
- Remove tenders from marinade, letting excess drip off.
- Coat in the flour mixture, pressing firmly to adhere.
- Dip into the egg wash.
- Coat in panko breadcrumbs, pressing gently.
- Place coated chicken on a wire rack and rest for 10 minutes.
5. Fry the Chicken
- Heat vegetable oil in a skillet or deep fryer to 350°F (175°C).
- Fry in batches for 4-5 minutes per side until golden brown.
- Drain on a wire rack.
6. Serve with Baconnaise
- Serve hot tenders with a side of baconnaise for dipping.
- Sprinkle with reserved crispy bacon crumbles for extra flavor.
Notes
- For an Air-Fryer Option: Cook at 375°F for 12-14 minutes, flipping halfway.
- For a Spicy Kick: Add extra cayenne and hot sauce.
- Make it Gluten-Free: Use GF panko and flour.
- Prep Time: 15 minutes
- Cook Time: 15 minutes
- Category: Dinner
- Cuisine: american
Keywords: Baconnaise chicken tenders, crispy fried chicken, buttermilk fried chicken, bacon mayo dipping sauce, crunchy chicken tenders
Conclusion
The baconnaise smash burger represents everything I love about cooking – how understanding a few simple techniques can transform everyday ingredients into something extraordinary. There’s something deeply satisfying about creating restaurant-quality food at home with basic components and no special equipment.
The beauty of this recipe is in its perfect balance of flavors and textures: the crispy-edged, juicy patty; the smoky, creamy baconnaise; the fresh crunch of vegetables; and the soft give of a toasted brioche bun. Each element plays its part in creating a burger experience that’s greater than the sum of its parts.
Next time you’re craving a truly excellent burger, skip the takeout, heat up that cast iron, and give this baconnaise smash burger a try. It might just ruin restaurant burgers for you forever – in the best possible way.